Transforming Spaces: Our Journey of Bathroom Renovation Process and Personal Style

I was so eager to update this space that I actually tore out and sold all the original fixtures on FB Marketplace a month or so after we moved into the house.
Unfortunately, right after tearing out the original vanity/sink in preparation for our quick budget friendly bathroom facelift, the project got thrown to the back-burner so we could focus on getting the kitchen completed. (Because when you have to choose between getting your only kitchen completed and getting your extra guest bathroom done, you pick the kitchen). And then Covid hit…
The Bathroom Renovation Process :
I’m not going to break down our reno process too much in this post as I plan to create several follow-up posts breaking down each of the many projects we tackled during this reno. (Not to mention this post would turn into EVEN MORE of a novel than it already is if I did.) But as a “quick” summary here’s a running list of the work done in here to give you an idea of the scope of work we completed in this space
Bathroom Transformation Journey
- Removed the existing cracked and broken floor tile.
- Laid down new black mini-hex floor penny tiles.
- Grouted floor with a black grout.
- Applied wall moldings around the entire room with inset trim details and extra tall chunky new baseboards.
- Replaced the existing bi-fold closet doors with a set of antique pocket doors
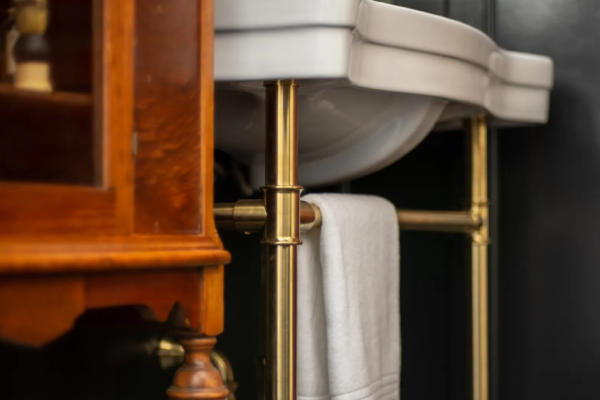
- Hired a plumber to move the existing plumbing for the sink. (We needed to recenter it on the wall where our sink was going and update it to be more appropriate for a console style sink).
- Moved the wiring for the junction box for the vanity light over a bit in order to better center it above where the new sink would be going.
- Moved the wiring for the plug next to the sink over a tad so it wouldn’t run into our trim work.
- Skim coated all the walls to knock down the existing wall texture a bit and smooth them out.
- Wood filled, caulked and sanded all trim work in preparation for paint.

The Bathroom Renovation Process
Our bathroom renovation Process began with a complete overhaul of the existing space. The first step was removing the old, cracked, and broken floor tiles. We chose to replace them with new black mini-hex floor penny tiles, which were then grouted with black grout to give a modern, cohesive look.
Bathroom Transformation Journey
The bathroom transformation journey involved more than just cosmetic changes. We applied wall moldings around the entire room with inset trim details and extra tall, chunky new baseboards, giving the bathroom a refined and elegant appearance. The existing bi-fold closet doors were replaced with a set of antique pocket doors, adding both function and aesthetic appeal.
Plumbing and Electrical Updates
An essential part of our bathroom renovation Process was updating the plumbing and electrical systems. We hired a plumber to move the existing plumbing for the sink to recenter it on the wall and make it more appropriate for a console-style sink. Additionally, we moved the wiring for the junction box for the vanity light and the plug next to the sink to better accommodate the new layout.
Wall Treatment
To enhance the walls, we skim-coated them to knock down the existing texture and smooth them out. This step was crucial in preparing the walls for the elegant wall moldings and new paint.
Paint and Finishing Touches
After wood filling, caulking, and sanding all the trim work, we chose a color scheme that would bring our vision to life. The painting process transformed the bathroom into a space that reflected our unique style – a mix of an old English gentleman’s club, a cabinet of curiosities, art deco glamor, and craftsman charm.
Reflecting on the Completed Project
Looking back on our bathroom transformation journey, what I love most is that I feel like I was able to truly translate my vision into reality. The project was not just about renovating a space; it was about bringing a unique and personal concept to life.
Future Plans and Advice
As I plan several follow-up posts, I aim to break down each aspect of this bathroom renovation Process in more detail. For anyone embarking on their own renovation journey, my advice is to be bold in your design choices, patient in the process, and attentive to both functionality and aesthetics.
Conclusion
Our bathroom renovation Process was a labor of love, and the result is a space that is not only functional but also a true reflection of our personal style. The journey, though challenging at times, was incredibly rewarding. This project has shown that with a clear vision, proper planning, and a bit of creativity, transforming a bathroom into a personal sanctuary is entirely possible.
In conclusion, a bathroom renovation Process is more than just a series of tasks to update an old space; it’s a journey of transformation, where the end result is a harmonious blend of functionality, style, and personal expression. Whether you’re planning a major overhaul or a simple update, remember that your bathroom can be a space that not only meets your practical needs but also reflects your unique taste and style.
You can follow us on Social Media
For more information, you can contact us!
